Rose Wings 2

Rose wing 2,

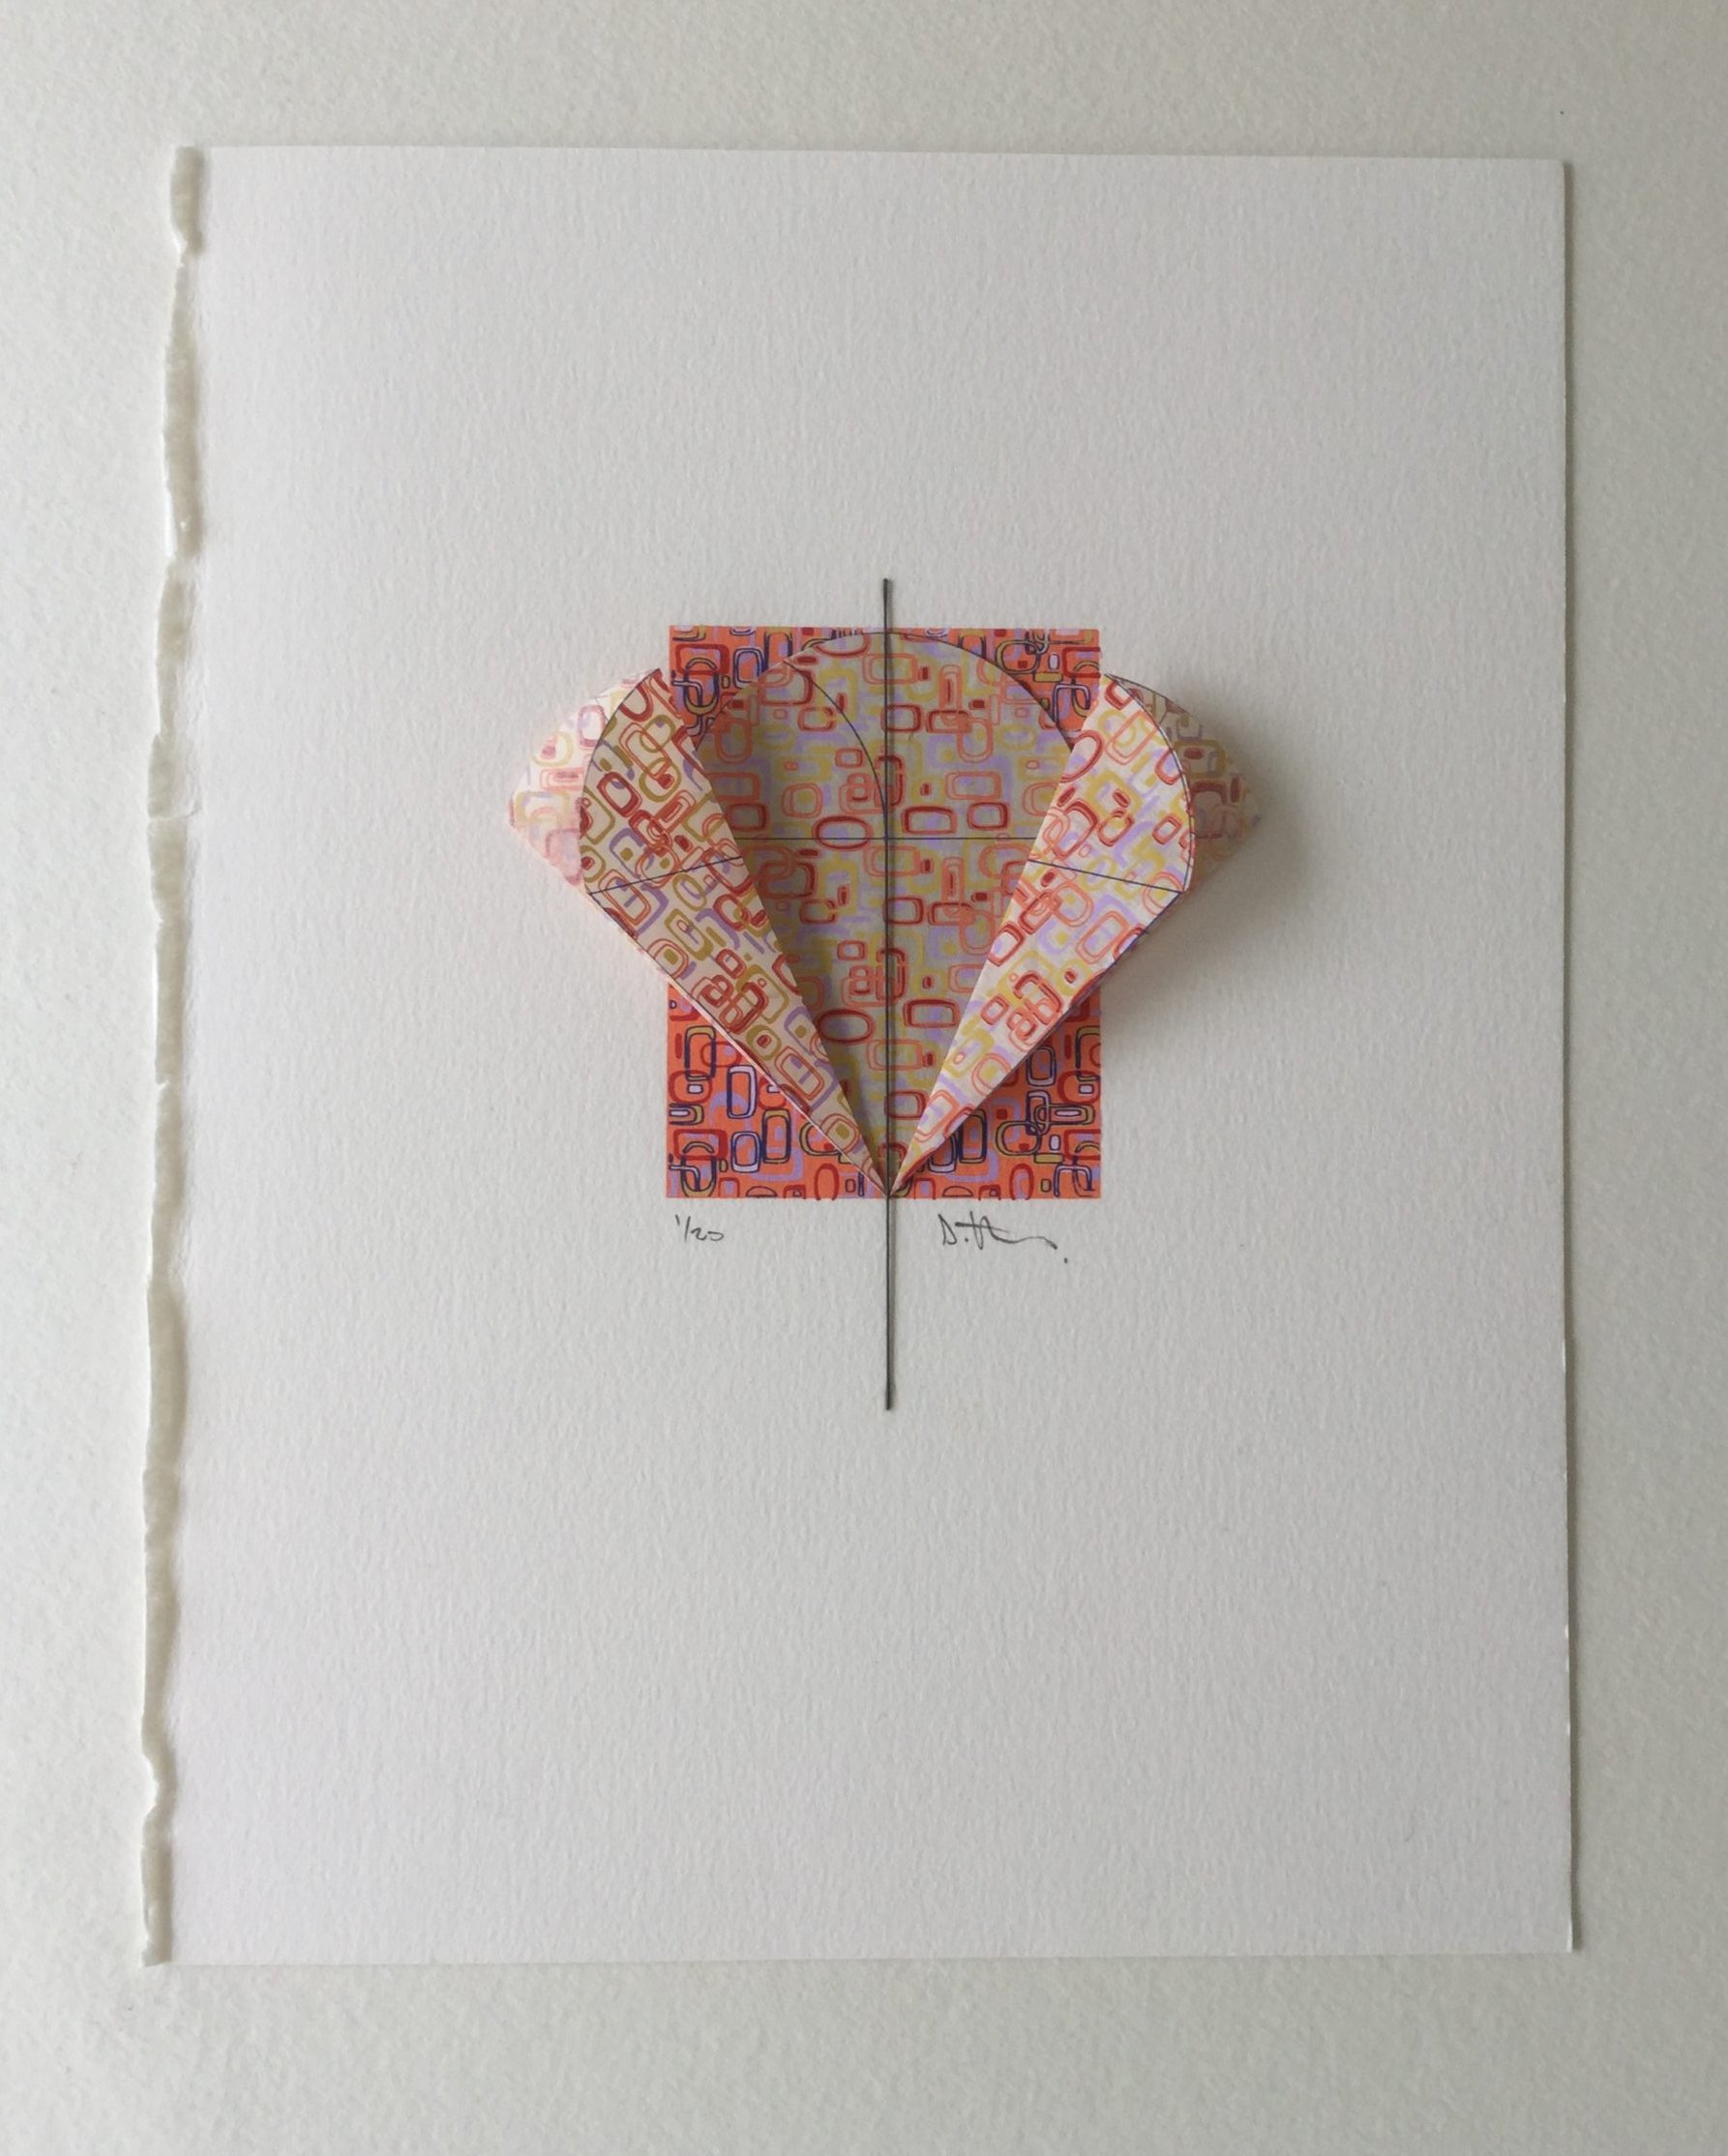
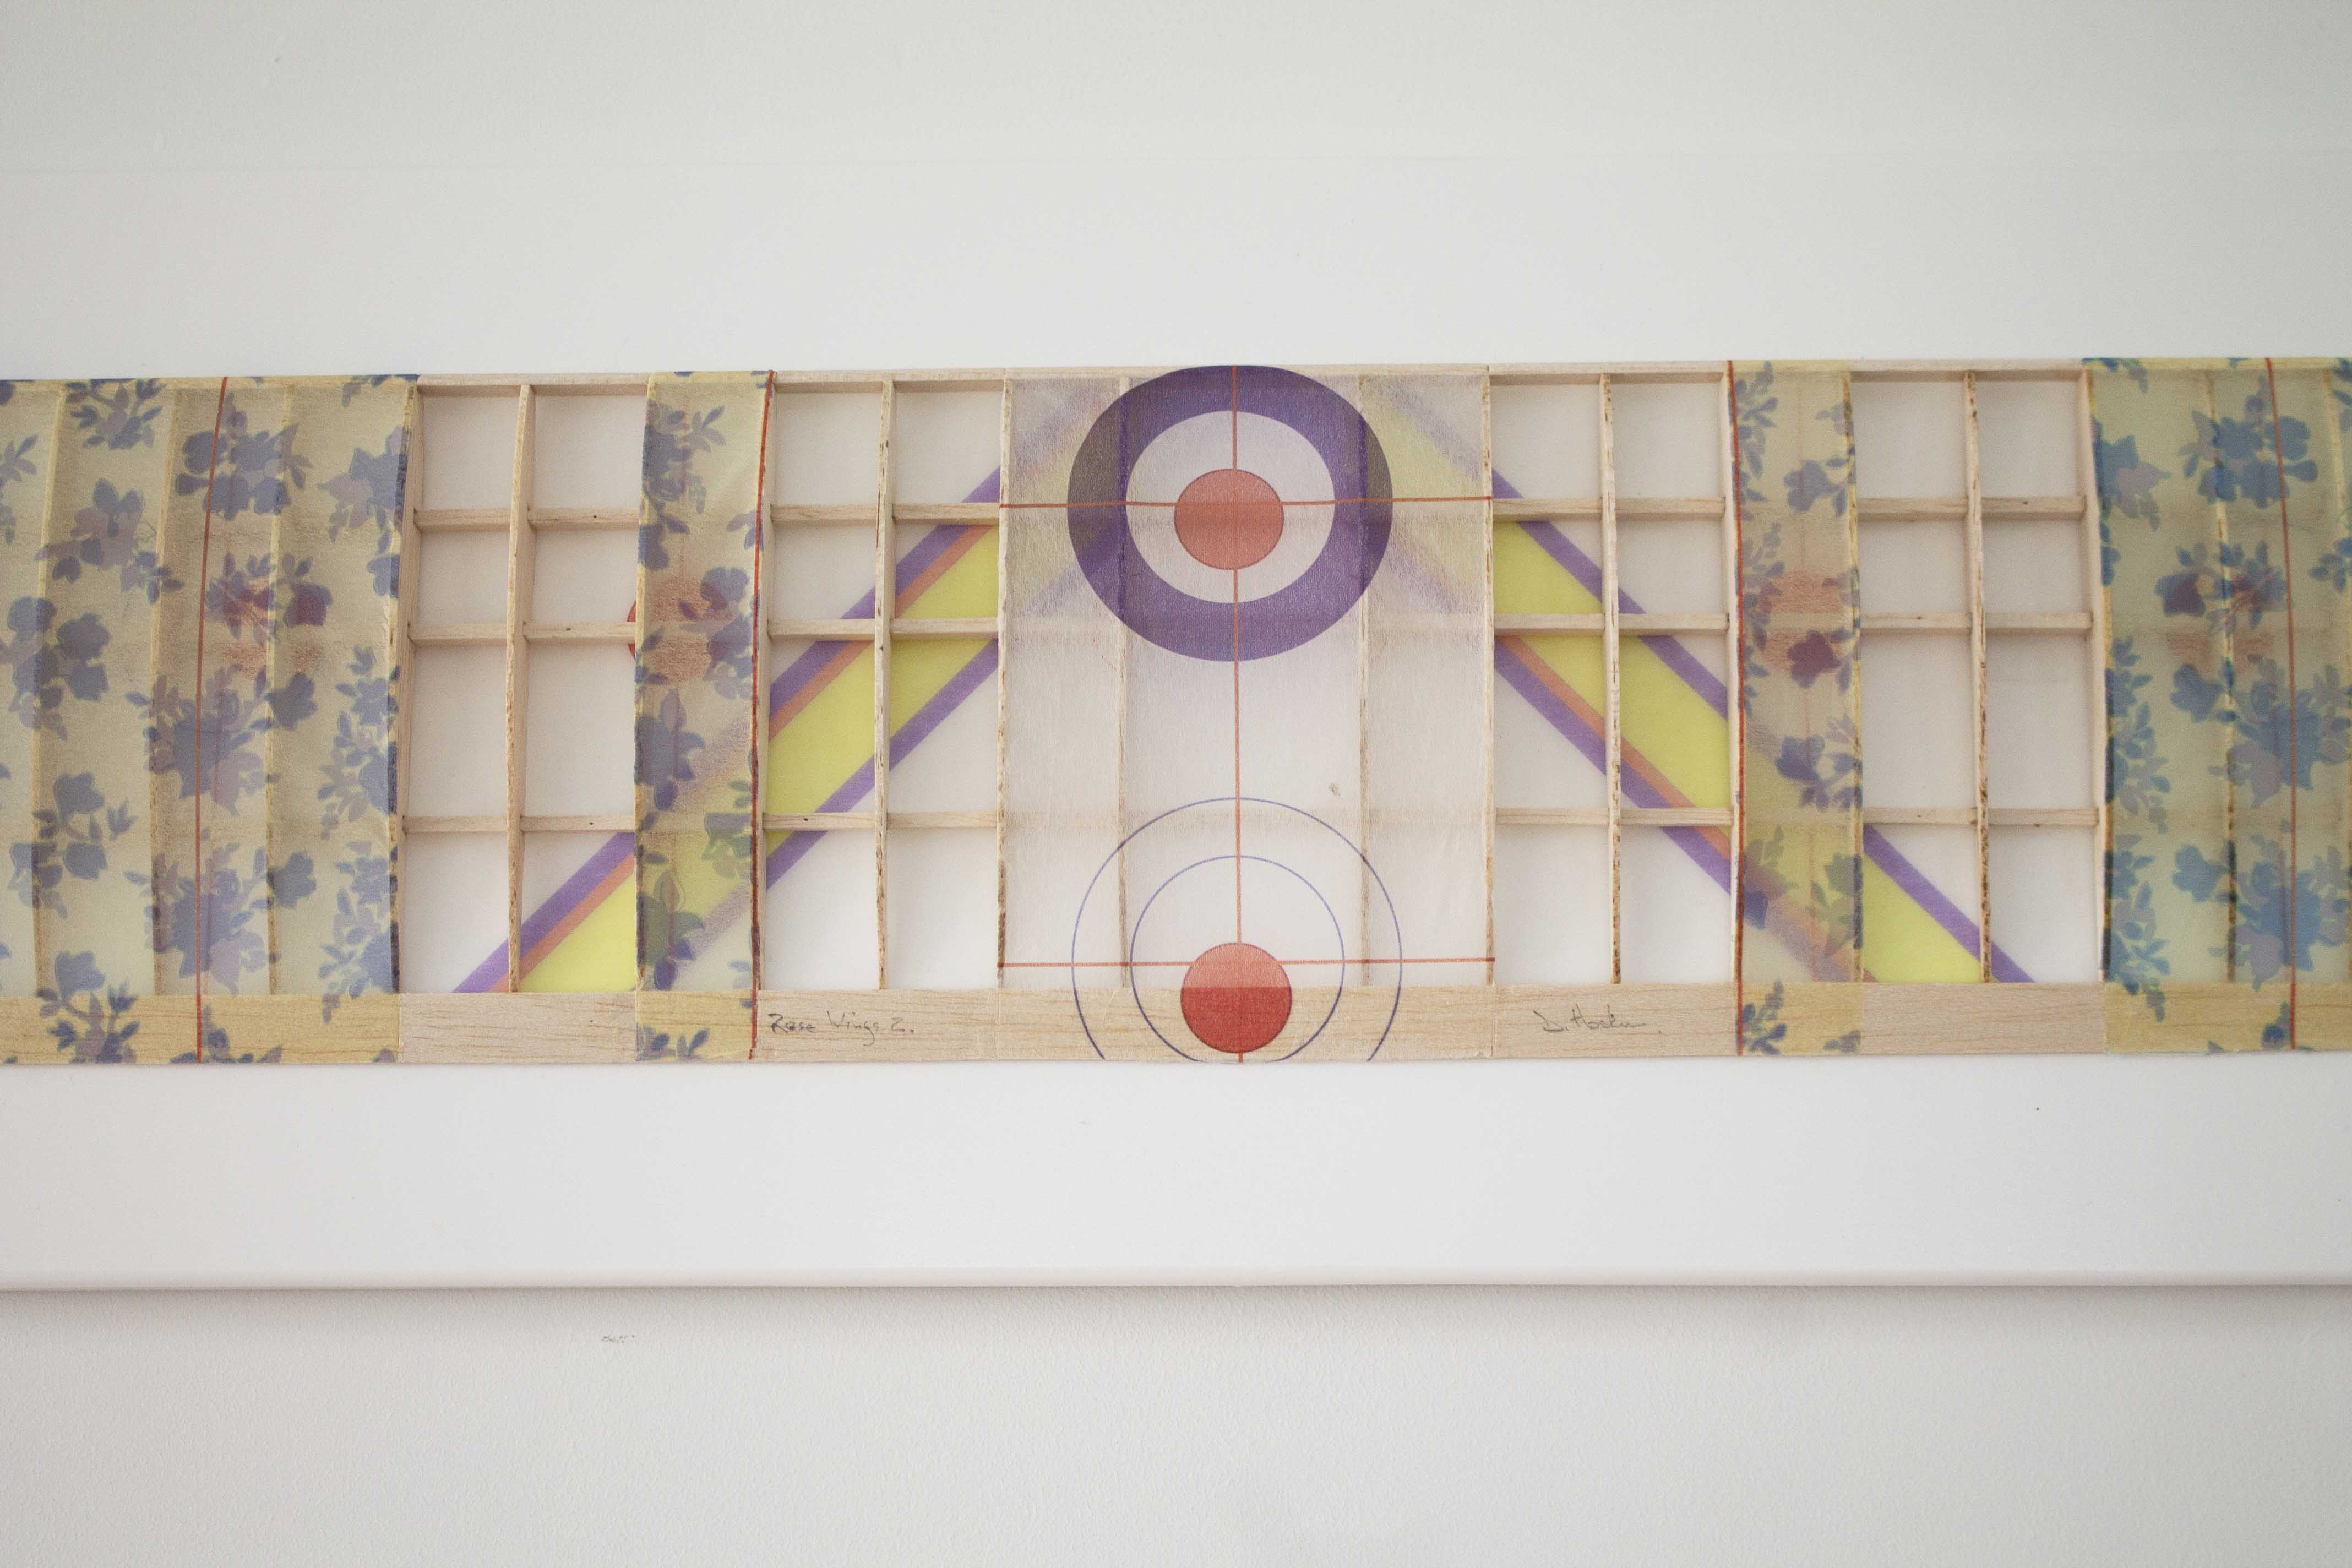
Made for the online exhibition as part of the Impact conference in Hong Kong. Rose wing 2 logically pairs with Rose Wing one which was exhibited and sold at the 2018 Royal Academy Summer Exhibition. Rose Wing 2 is 1.7 metres long by 18 cms high and 3 cms deep.

Rose wings 2 Detail

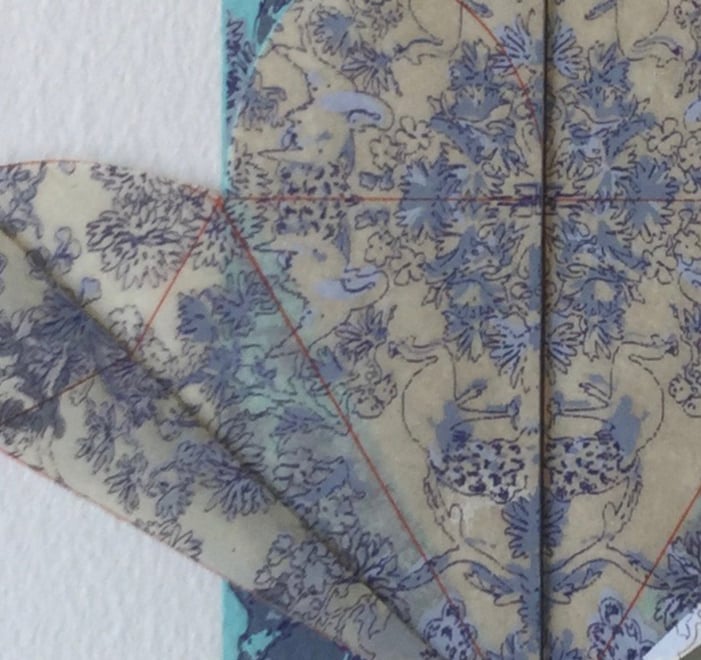
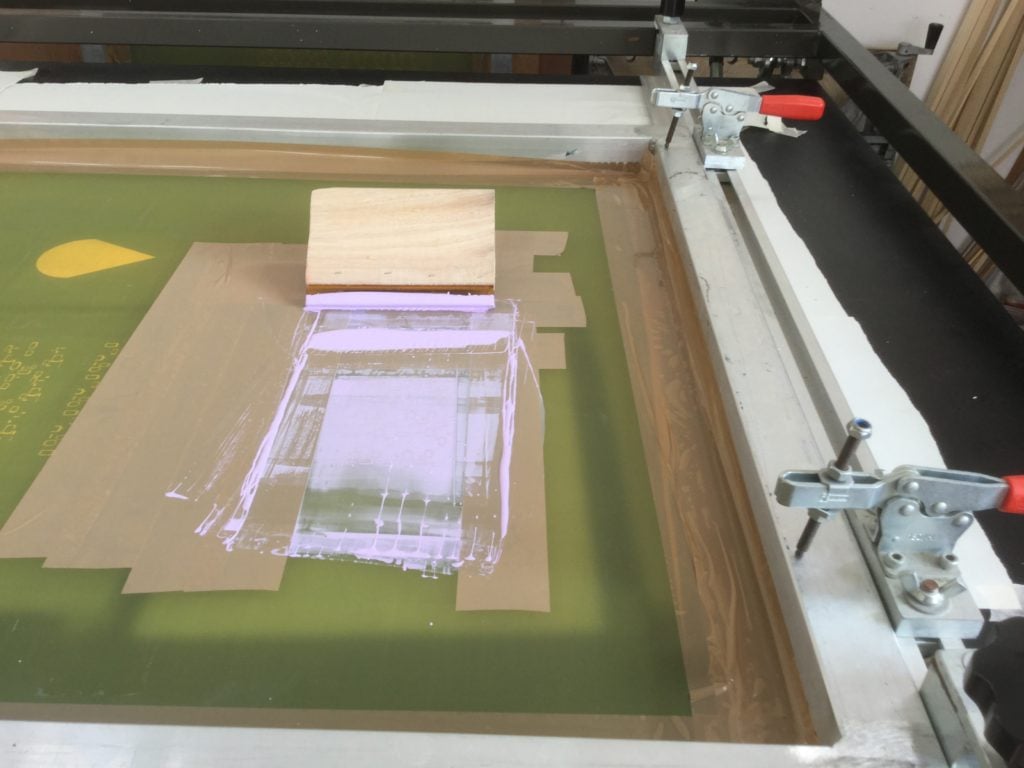
The wings are made of laser cut balsa wood which are glued together with PVA glue. They are then covered in 13 gsm Japanese tissue, which is inkjet printed. Sadly I have become allergic to super glue whilst making these aeroplane artworks and either have to wear a gas mask whilst making them, or I now use PVA and hold everything together with dressmaking pins whenever I can. When I made model aeroplanes as a child I used balsa cement which contained acetone and the aeroplane engines were powered by an ether and oil mixture. At age 14, I was allowed to go to the local pharmacy and buy 2 pints of ether over the counter and bring this highly volatile and explosive mixture, home on the bus in a brown glass bottle. Life has become more boring , but a great deal less harmful.

I have said before that I wanted to move away from the traditional aeroplane roundels and markings of war that occurred on model aeroplanes and create something much more friendly, that conveys my love of flying models and early aeroplanes. This love was passed down from my father. The only two books I inherited from him, were Charles Kingsford Smith, My Flying Life and the Autobiography of the Dutchman Anthony Fokker.

I have found a way of printing the lightweight tissue on a backing support, so that on most passes through the wide format printer the tissue does not all scrunch up and jam the printer. One of the distinct advantages of working in, and having run a large university research centre, The CFPR at UWE Bristol. Is that I have the time and space to run a wide format machine at its very limits and can then clean it down afterwards. I also can set the ink limits and colour management to my personal satisfaction and not have to rely on a RIP to balance the colour on a material that will only take a very limited ink deposit in the first place.

First print from the new studio

IMG_0700
’70’s Wallpaper’ Screenprint with Japanese paper and carbon fibre rod

This is the first screenprint that I completed last year in my new studio. It has taken a while to get the studio up and running, but although small is well equipped and functions very well if I am very tidy. This print pairs with the print I made at the Frans Masreel Centrum in Belgium a couple of years ago called ‘French Peacocks.

Both prints are based around my interest in using wallpaper motifs in my prints that have a visual resonance for me. The peacocks are derived from our current wallpaper in our lounge. The 70’s wallpaper is derived from my bedroom at home when I was 17. The 70’s were all about orange and a sludge brown ochre.

French Peacocks detail

You can just make out the peacocks in the detail above and the motifs in the new print are classic 1970’s. I am sure these days that the bright orange is somewhat more luminous than was the case in the 70’s. My memory of my bedroom was that the orange had a lot more black in it and was really quite dull by 21st Century standards.

Printed main image before assembly
Main image before assembly

Here is the main background image before assembly and below is the printed Nepalese paper before assembly. I like to make life hard for myself by not just creating a flat print. The nepalese paper is then cut using an old fashioned cutting compass and scalpel. Cutting 25 takes quite a while but I think the result is worth it in the end

printed Nepalese paper before assembly

Finally the print is assembled and the carbon fibre rod is attached.

Steve’ s studio and new prints

Finally ready to start printing in my studio at long last. This will be the first screen print I have made in the studio since I built it 3 years ago. I have finally got the studio just right so that everything has a place and I ca happily print. As you can see the screen is all set up on he vacuum bed and ready to print.

Cutting the paper for my new print, I am using Velin Arches Blanc 400gsm, part of a stock of paper i have had for many years. You can see all the packets of paper under the bench waiting to be printed

Printing the 3 rd colour of my new screen print, it is so nice to be printing again in my own studio. I am using TW water based inks, which I love, they have a great range of intense colour and both white and transparent bases. I have used these inks for years and they still remind me of the old oil based inks in their feel.

Third colour printed, hard to see from this image as the base orange is so dominant. It is the colour of my bedroom when i was in my teens many years ago. This is an edition of 25 prints to go with the French Peacocks print that I made at the Frans Masreel Centrum a couple of years ago. I have 3 more colours on these backgrounds and then 5 colours to print on the Nepalese tissue which will go onto the print along with a carbon fibre rod or 2.

Woolwich Print Fair

Photo of  my Belgian Rose kite print at the Woolwich Print Fair this weekend. Complements of the photogravure specialist Peter Moseley who is also showing. This is the second timje I have participated in the three years the fair has been running.The show runs from today Thursday until 5.00 pm Sunday the 25th November

Recently returned from the Homo Faber Crafting a Human Future exhibition and conference series. Where I was part of a round table discussion ‘Crafts in the Digital Age’ available here.

https://www.homofaberevent.com/en/talks-and-debates


Advertisement for Homo Faber next to St Marks Square

My part in this grand event seemed to be that I was the voice of an unwanted future as everywhere were prominent statements promoting the hand made. Having been invited to talk about a digital future that appeared to be contrary to the theme of the event. That was not how it panned out as much of the discussion revolved around what i would call the craft of the digital and the need for a very real material understanding before you can master the use of digital tools.

All in all, this was an amazing event  which lasted two  weeks, consisted of  eleven separate exhibition halls, demonstrations of many different craft skills and a comprehensive programme of debates and talks, hence my invitation.

It all took place on the island of San Giorgio Maggiore, which is situated opposite St Marks Square, with a dedicated Vaporetta service to the island from St Marks.  The work display  ranged from traditional basket making to restored Ferrari’s and beautifully restored swimming pool, which was used to display a fashion exhibition

The Fashion Exhibition in the restored swimming pool

Restored Ferraris in the Technology exhibition

I was very glad to see copies of my book 3D printing for Artists, Designers and Makers, published by Bloomsbury Academic, prominently on display in the exhibition bookshop

Not only was this event a huge success with Sixty one thousand people attending, but the organisers are already promoting the next event in 2020

Hello world!

Welcome to the blog of Stephen Hoskins, printmaker and artist.

I have been making prints for over forty years, in fact I made my first linocut at the age of 13, which hung in a corridor at my school. Since then my love for the art has continued unabated. My first love is screen printing, but I am just as happy with digital print, lithography and laser cutting.